


Welcome to “Making a 3D Browser Game in Three.js with Chat GPT AI”! In this post, we will explore the exciting world of game development by combining the power of the Three.js library with the cutting-edge capabilities of Chat GPT AI. Together, we will create a visually stunning and engaging 3D browser game that not only demonstrates the prowess of modern web technologies, but also showcases the potential of AI-driven game design. So, buckle up and get ready to embark on an extraordinary journey where creativity, interactivity, and innovation come together to redefine the gaming experience.
Setting up Vite
First, head to the directory where you’d like your project to reside and execute the following command. For assistance on installing vite for the first time, click here Vite Quickstart Guide
npm create vite@latestUpon completing these steps, you’ll have the opportunity to name your project and choose a framework from a list of options. Opt for
vanilla:vanilla.
Proceed to the newly created project folder using the cd command and install the Three.js package:
cd your_project_folder
Install Three.js.
npm install three
Now to start the application type:
npm run dev
Access http://localhost:3000/ in your browser.
Creating a Game in Three.js
In this tutorial, we will be using Three.js to create a simple game. We will cover several topics including creating objects, handling collisions, adding sound, and creating user interfaces.
Creating the Scene, Camera, and Renderer
We start by creating the scene, camera, and renderer. We set up the camera to be positioned farther away from the character so that we can see the character’s movements better. We also set up the renderer to match the size of the window and add it to the document.
const scene = new THREE.Scene();
const camera = new THREE.PerspectiveCamera(45, window.innerWidth / window.innerHeight, 0.1, 1000);
camera.position.set(8, 8, 8);
const renderer = new THREE.WebGLRenderer();
renderer.setSize(window.innerWidth, window.innerHeight);
document.body.appendChild(renderer.domElement);
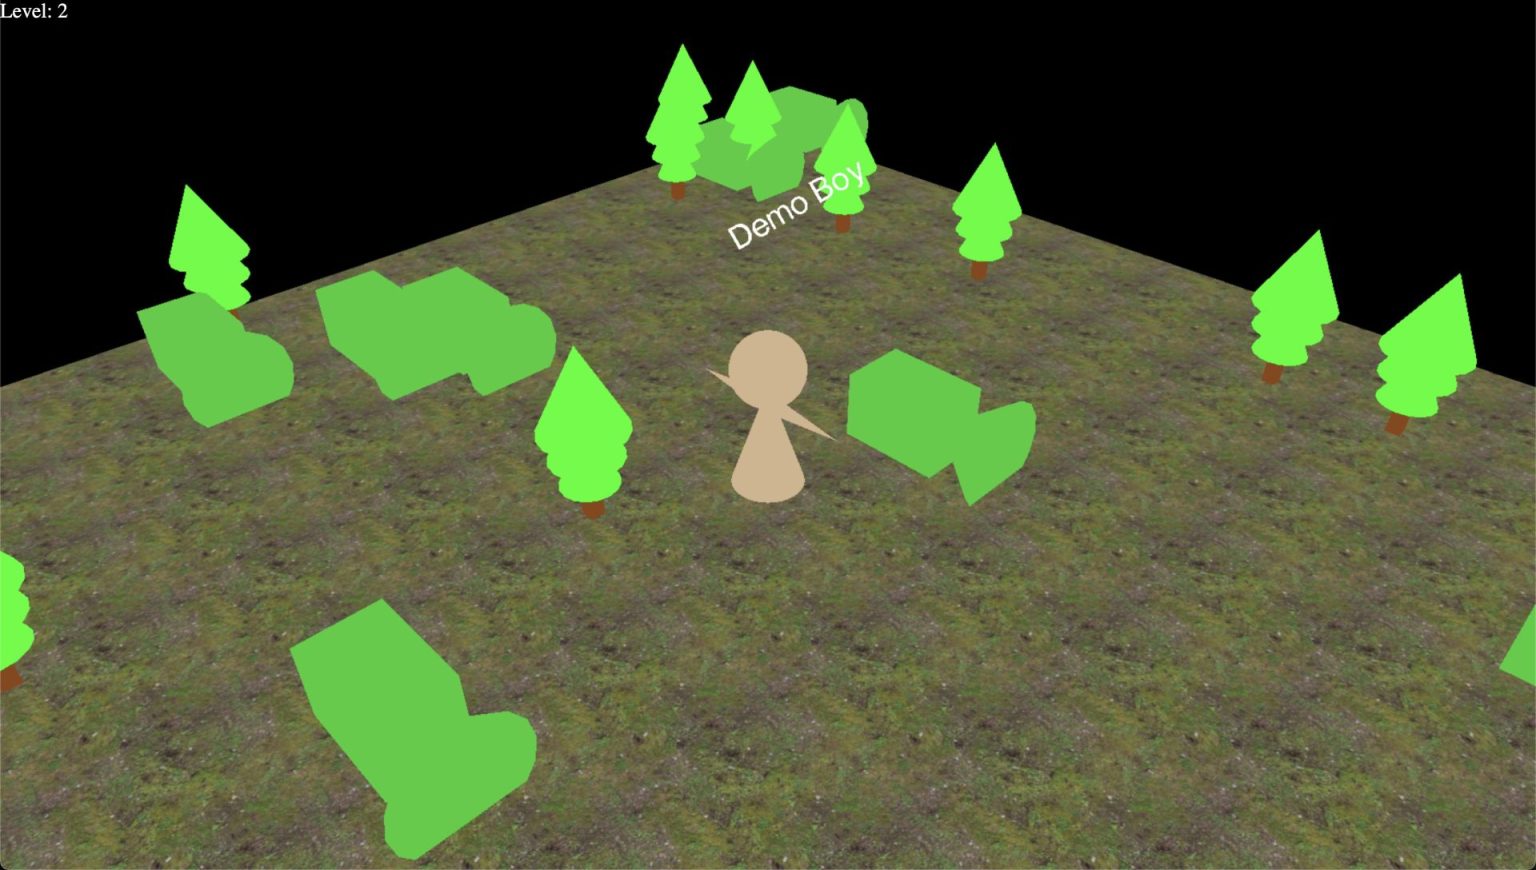
Creating the Character
We create the character using a cone for the body and a sphere for the head. We position the head on top of the body and add the head as a child of the body. We also create arms for the character using cones and add them as children of the body. Finally, we create a label above the character using a sprite.
const bodyGeometry = new THREE.ConeGeometry(0.5, 1.5, 32);
const bodyMaterial = new THREE.MeshBasicMaterial({ color: 0xd2b48c });
const body = new THREE.Mesh(bodyGeometry, bodyMaterial);

const headGeometry = new THREE.SphereGeometry(0.5, 32, 32);
const headMaterial = new THREE.MeshBasicMaterial({ color: 0xd2b48c });
const head = new THREE.Mesh(headGeometry, headMaterial);
head.position.set(0, 1, 0);
body.add(head);

const leftArmGeometry = new THREE.ConeGeometry(0.1, 1, 32);
const leftArmMaterial = new THREE.MeshBasicMaterial({ color: 0xd2b48c });
const leftArm = new THREE.Mesh(leftArmGeometry, leftArmMaterial);
leftArm.position.set(-0.7, 0.5, 0);
leftArm.rotation.z = Math.PI / 2;
body.add(leftArm);

const rightArmGeometry = new THREE.ConeGeometry(0.1, 1, 32);
const rightArmMaterial = new THREE.MeshBasicMaterial({ color: 0xd2b48c });
const rightArm = new THREE.Mesh(rightArmGeometry, rightArmMaterial);
rightArm.position.set(0.7, 0.5, 0);
rightArm.rotation.z = -Math.PI / 2;
body.add(rightArm);

const fontLoader = new FontLoader();
const textMaterial = new THREE.SpriteMaterial({ color: 0xffffff });
fontLoader.load('https://cdn.rawgit.com/mrdoob/three.js/r129/examples/fonts/helvetiker_regular.typeface.json', function(font) {
  const textGeometry = new TextGeometry('Demo Boy', {
    font: font,
    size: 0.2,
    height: 0.01,
  });
  const text = new THREE.Sprite(textMaterial);
  text.scale.set(1, 0.5, 1);
  text.geometry = textGeometry;
  text.center.set(0.5, 0);
  text.position.set(0, 2, 0);
  body.add(text);
});
scene.add(body);
Adding UI Elements
In order to add UI elements to the game, we will make use of HTML and CSS. Specifically, we will create a div element that will house the level and game over screens. We will also create some styles to make the UI look a bit nicer.
HTML
We will add the following code to our HTML file:
<div id="ui">
  <div id="level"></div>
  <div id="gameover"></div>
</div>
This creates a div with an id of “ui” and two child divs, one with an id of “level” and one with an id of “gameover”.
CSS
We will add the following styles to our CSS file:
#ui {
  position: absolute;
  top: 0;
  left: 0;
  width: 100%;
  height: 100%;
  background-color: rgba(0, 0, 0, 0.5);
  display: none;
  justify-content: center;
  align-items: center;
  flex-direction: column;
}
#level, #gameover {
font-size: 3em;
color: white;
margin-bottom: 0.5em;
}
These styles give the “ui” div a black background with 50% opacity and centers its child elements both horizontally and vertically. The “level” and “gameover” divs have a font size of 3em, are white, and have a small amount of bottom margin.
Javascript
Finally, we will add some Javascript to our code to show and hide the game over screen, as well as update the level screen.
const levelElement = document.getElementById('level');
const gameOverElement = document.getElementById('gameover');
const uiElement = document.getElementById('ui');
function showGameOverScreen() {
gameOverElement.style.display = 'block';
uiElement.style.display = 'flex';
}

function updateLevelScreen(level) {
levelElement.textContent = Level ${level};
}

function init() {
// ...
}

function animate() {
// ...

if (gameOver) {
showGameOverScreen();
}
}

init();
animate();
These functions allow us to show the game over screen and update the level screen as necessary.
Conclusion
With these changes, we have added a UI to our game that displays the current level and can show a game over screen. These elements can be styled as desired and used to convey important information to the player.