


Godot Tilesets are an essential component in the creation of 2D game worlds using the Godot game engine. In this in-depth guide, we’ll explore the properties of Godot Tilesets, how to create and optimize them for your games, and provide several code examples to help you get started. Be sure to check out our article on Mastering Godot Tilemaps for additional insights into building 2D game worlds in Godot.
Understanding Godot Tilesets
Tilesets are collections of individual tiles that can be used to build game levels in a grid-like pattern. They are widely used in 2D game development, especially for creating tile-based games like platformers, top-down RPGs, and puzzle games. Godot Tilesets provide an efficient way to create, manage, and use these collections of tiles in your game projects.
Godot Tilesets are resources that can be created and edited within the Godot editor, allowing you to easily define properties such as collision shapes, navigation polygons, and occlusion shapes for your tiles. You can create tilesets from scratch or import them from external sources like image files or sprite sheets.
Link to Godot TileSets Documentation
Creating TileSets in Godot
Creating a tileset in Godot is a straightforward process. First, you’ll need an image file or sprite sheet containing the individual tiles you want to use. You can create your own or find free and paid tilesets online.
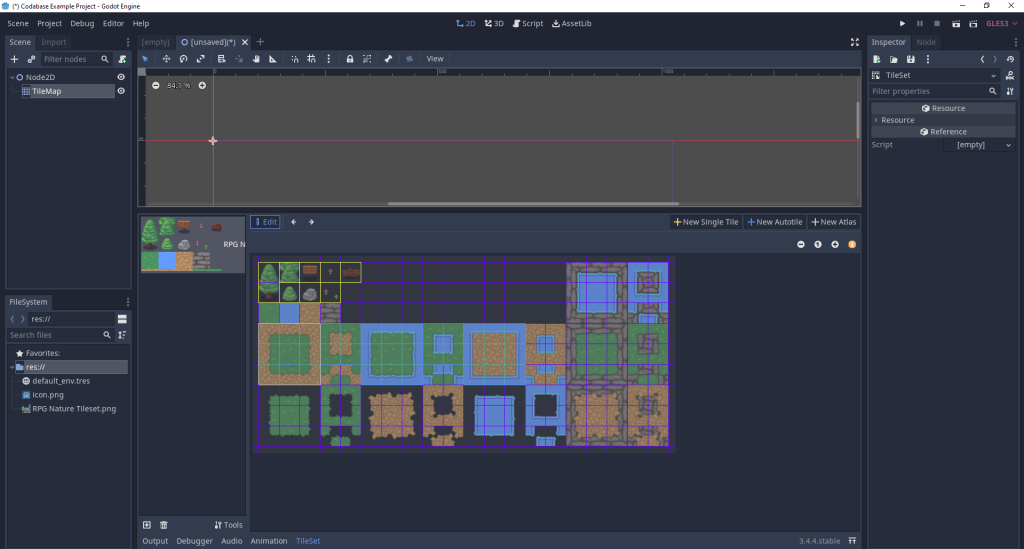
For this demonstration, I’ll be using RPG Nature Tileset – Seasons by Stealthix on itcho.io.
Once you have your image file or sprite sheet, follow these steps to create a Godot Tileset:
- Open the Godot editor and create a new TileSet resource by clicking on the “New Resource” button in the FileSystem dock.
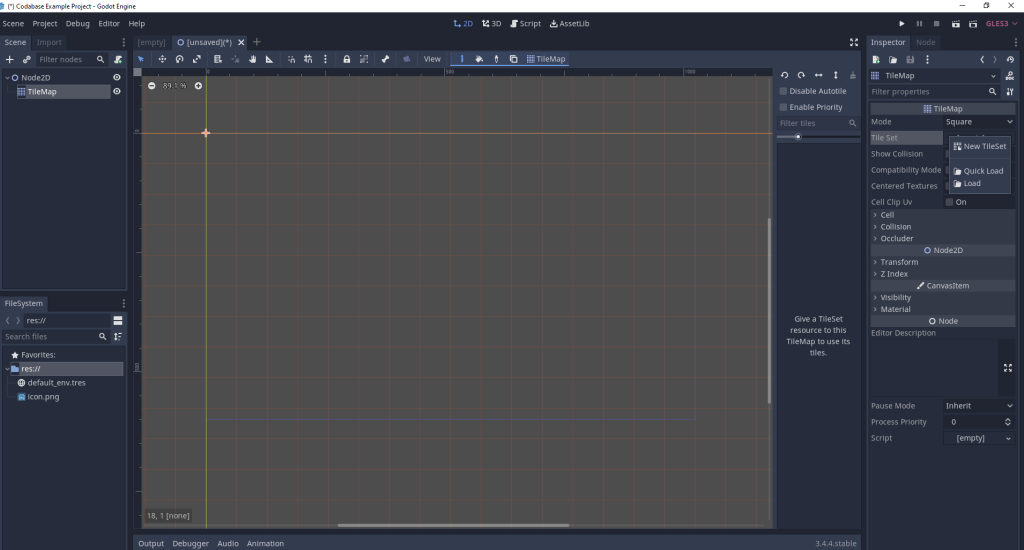
- Select “TileSet” as the resource type and click “Create.”
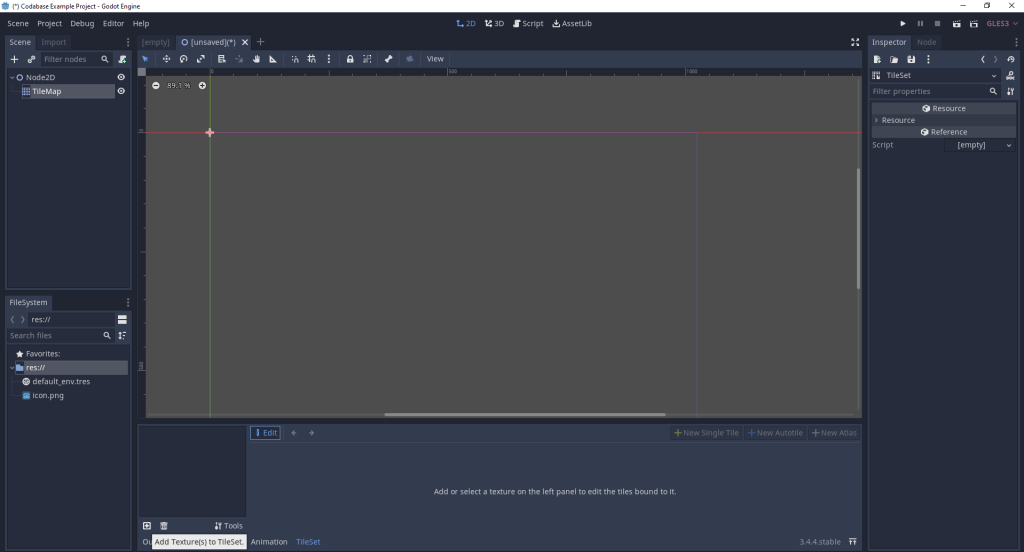
- Click on the TileSet resource and navigate to the “Inspector” dock. Here, you can edit the properties of your tileset, such as the tile size, collision shapes, and more.
- Add your image file or sprite sheet to the TileSet resource by clicking on the “Add Texture” button in the “Inspector” dock.
- Use the “Region” and “Snap” options in the “Inspector” dock to define the individual tiles in your tileset. The “Snap” options help you easily align your tiles based on their size and spacing.
- Save your TileSet resource by clicking on the “Save” button in the FileSystem dock. Your tileset is now ready to be used in your game!
Using Godot Atlas
A nice feature about Godot is the TileSet’s Atlas feature. With the Atlas, you can highlight a section of tiles and create a grouping in one go.
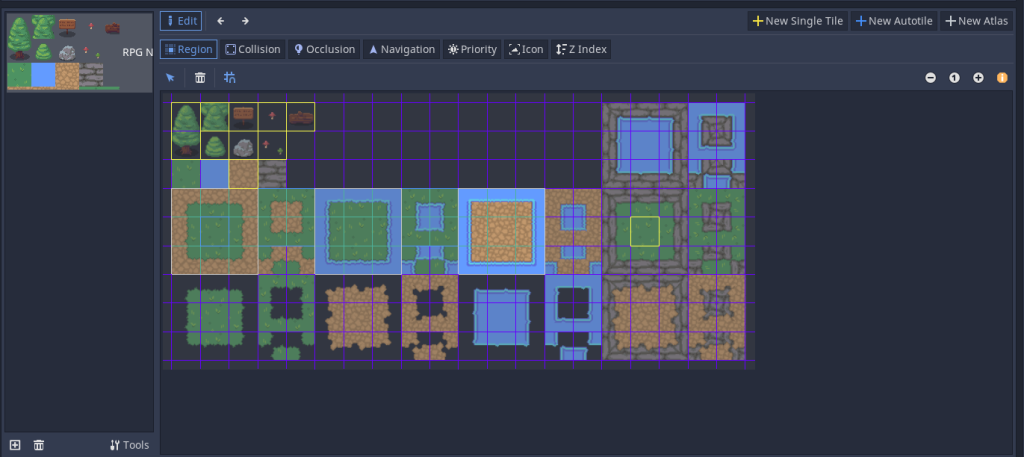
In the above image, you can see that I’ve highlighted a 3×3 block of the sand and water tiles. To do this, I followed the steps below:
- Click on “+ New Atlas” button in the TileSet inspector.
- Highlight the 3×3 area
- Voila!
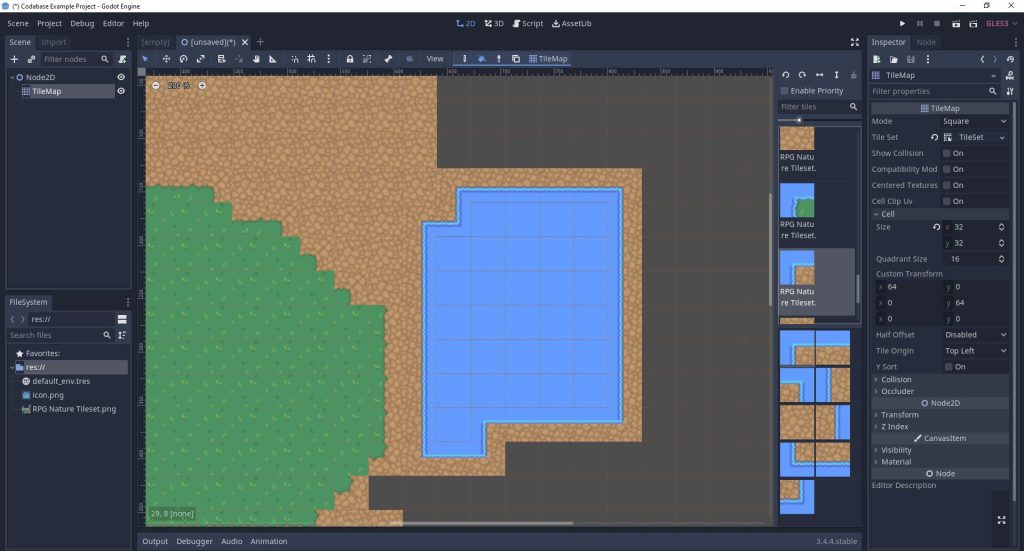
It’s very straightforward to create an Atlas. Now I’ll show you an example of the Atlas in use within the Editor.
Optimizing Godot Tilesets
Optimizing your Godot Tilesets can significantly improve the performance of your game, especially on lower-end devices. Here are some tips to optimize your tilesets:
- Use power-of-two texture sizes: When creating your image files or sprite sheets, use power-of-two dimensions (e.g., 256×256, 512×512) to ensure better compatibility and performance across different graphics hardware.
- Minimize the number of unique tiles: Reducing the number of unique tiles in your tileset can help improve performance, as it reduces the amount of texture data that needs to be loaded and processed. Try to design your game levels with a limited number of tiles and use them creatively to build varied and interesting environments.
- Use atlases: Combine multiple small textures into a single larger texture atlas to reduce draw calls and improve rendering performance. Godot supports texture atlases natively, allowing you to easily create and manage them within the editor.
- Optimize collision shapes: When defining collision shapes for your tiles, use simple shapes like rectangles and circles instead of complex polygons. This can reduce the computation required for collision detection and improve performance.
- Optimize navigation polygons: Similarly, when defining navigation polygons for your tiles, use simple shapes and try to minimize the number of vertices. This can help improve pathfinding performance in your game.
- Leverage Import Settings: For a 2D Tileset, a big mistake that most beginners make is not setting the proper import settings on the left-hand inspector (default). Check out the below image to understanding leveraging import settings to remove blur from your 2D tileset texture.
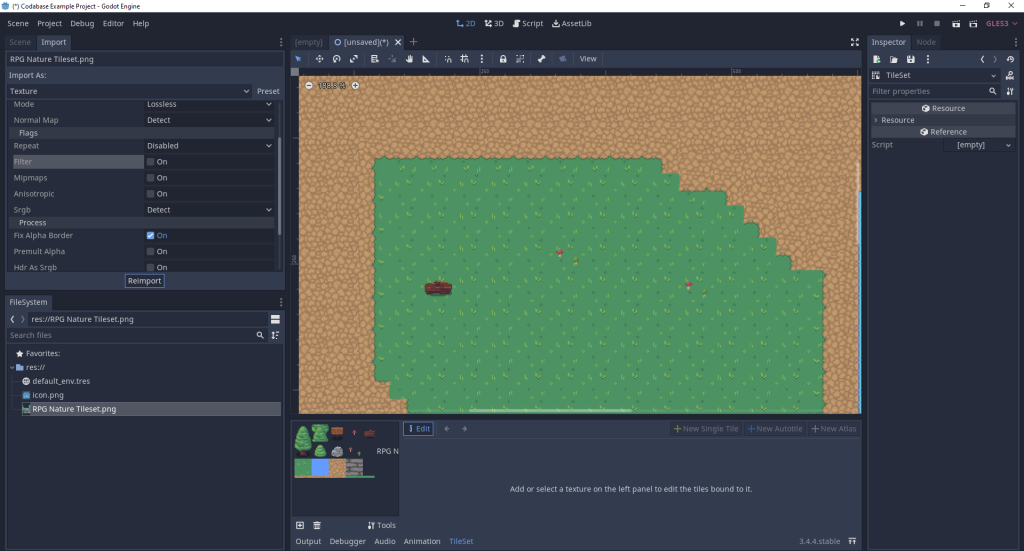
To properly set your 2D import, click on the asset of the png file that you uploaded for your tilemap, navigate to the “Import” option next to the “Scene Tree”. Deselect “Filter”, then hit “Reimport”. Once this is done, you’ll see that the 2D pixels become more crisp and do not have a “blurry filter” on the outside edges of the tilemap.
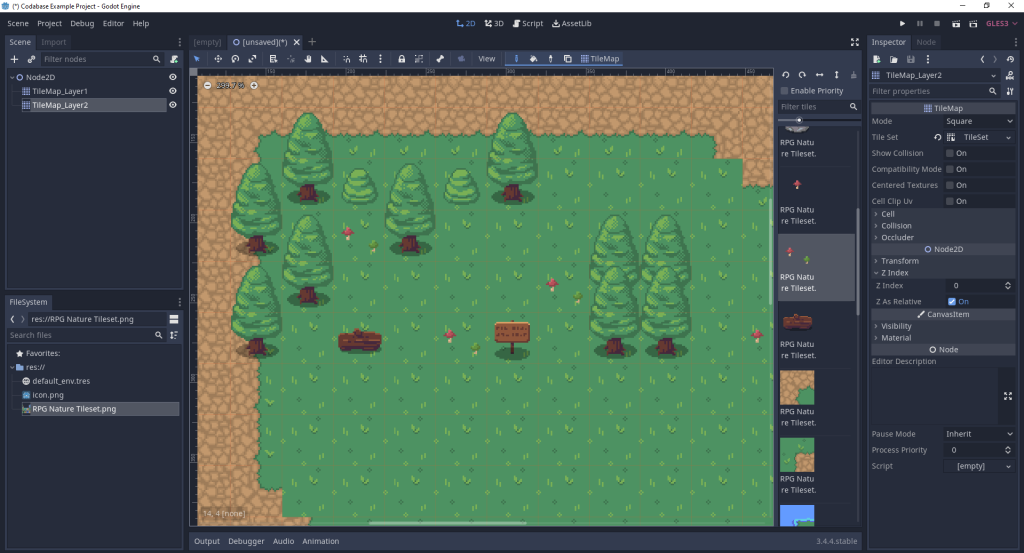
Layering TileMaps on top of one another
You’ll likely want to add some additional details to your tilemap. It’s easy by simply creating 2 identical tilemaps. Be sure not to copy the existing Tiles that you already placed into the second TileMap. Place them in your Scene tree like so:
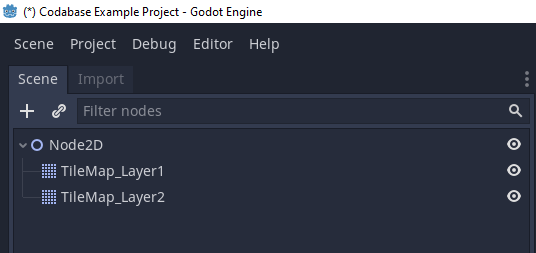
Result of adding tiles on the top layer:
Working with Tileset Properties in Godot
Godot Tilesets offer various properties that can be used to customize the behavior of your tiles in the game world. Some of the most commonly used properties include:
- Collision: You can define collision shapes for your tiles to enable collision detection between them and other objects in the game world. This is useful for creating solid ground, walls, or other obstacles.
- Navigation: By defining navigation polygons for your tiles, you can use Godot’s built-in navigation system to enable characters or objects to navigate around the game world.
- Occlusion: Occlusion shapes can be added to your tiles to create occlusion culling areas, which can help improve performance by reducing the number of objects rendered when they are not visible.
- Z-index: The Z-index property determines the draw order of tiles in the game world. Tiles with a higher Z-index will be drawn on top of those with a lower Z-index.
# Example of setting the Z-index of a tile in a script
tilemap.set_cell_z_index(x, y, z_index)
In conclusion, Godot Tilesets are a powerful tool for creating 2D game worlds. By understanding their properties and using them effectively, you can create visually appealing and optimized game environments. With the tips and code examples provided in this guide, you’re well on your way to mastering Godot Tilesets and building amazing 2D games.